Staging Tips That Make Real Estate Photos Pop
First impressions are everything in real estate—especially online. Before potential buyers ever step foot inside a home, they scroll through listing photos. If those pictures don't immediately capture attention, your property could be scrolled past in seconds. The good news? With smart staging, you can turn any space into a photo-ready masterpiece.
In this post, we’ll walk through simple but powerful staging tips to elevate your real estate photos. Whether you’re an agent, a homeowner, or even prepping for your first shoot, these tricks will help your photos shine.
1. Declutter Like a Minimalist
Nothing ruins a beautiful shot faster than clutter. Personal items, excessive furniture, and random objects can distract viewers and make rooms feel cramped.
Before the photo shoot:
Remove personal items like family photos, magnets, and toiletries.
Clear countertops, coffee tables, and nightstands.
Store away pet toys, shoes, and laundry baskets.
Clean, open spaces allow the camera to capture the true size and flow of the room—and invite viewers to imagine their own lives there.
2. Embrace Natural Light
Lighting is everything in photography. Whenever possible, shoot during the day and let natural light flood the space.
Tips to enhance lighting:
Open curtains and blinds to let in sunlight.
Replace dim or yellow-tinted bulbs with bright, daylight-balanced ones.
Turn on all lights (yes, even closet lights!) to create a warm, inviting glow.
Well-lit spaces not only photograph better—they look bigger, fresher, and more welcoming.
3. Use Strategic Furniture Placement
A common staging mistake is leaving too much or too little furniture in a room. Both extremes can make spaces look awkward or smaller than they really are.
What works best:
Use scaled-down furniture to make small rooms appear more spacious.
Float furniture (instead of pushing it against the wall) to create natural walkways.
Avoid blocking windows or architectural features.
Your goal is to show buyers how each room functions while allowing them to picture their own style in the space.
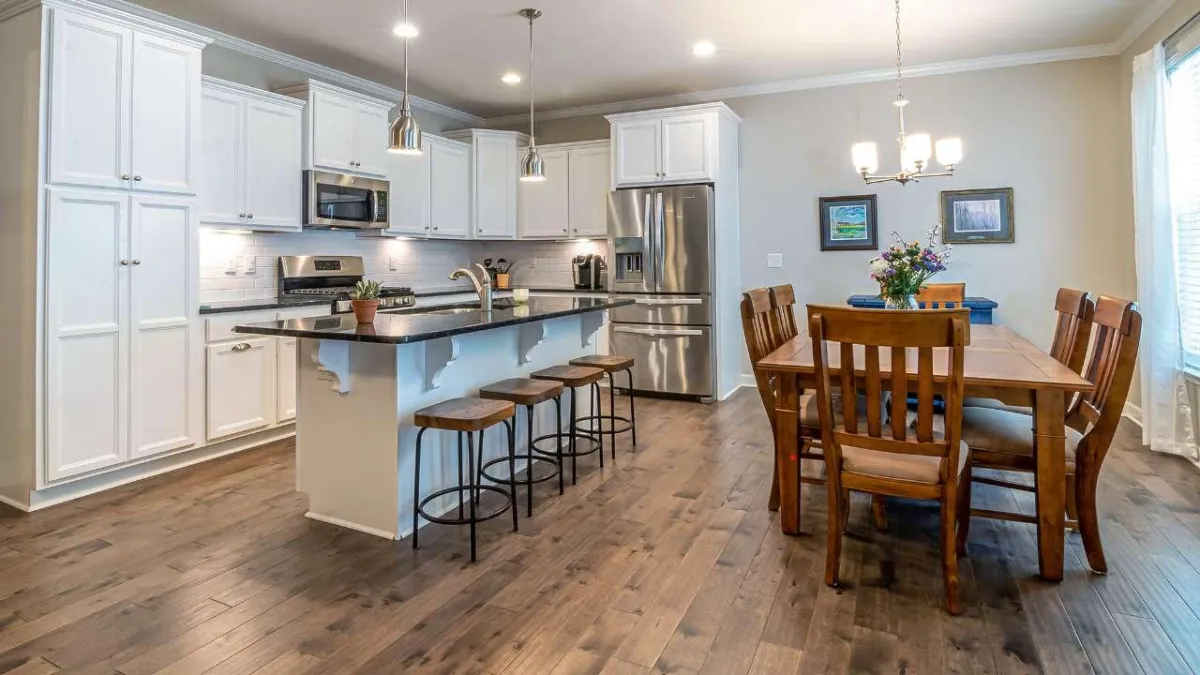
4. Add Simple, Neutral Decor
While the home should feel lived-in, it shouldn’t feel lived by someone else. Stick to neutral decor that appeals to a wide audience and doesn’t overpower the space.
Recommended additions:
Fresh white towels in bathrooms
A bowl of green apples or lemons in the kitchen
Soft throw blankets and pillows in the living room
Simple artwork or mirrors for texture and light
Little touches like these add warmth and personality—without being distracting.
5. Don’t Forget the Exterior
Curb appeal matters, especially in your first photo. A beautiful front shot can stop the scroll and drive clicks.
Before photographing outside:
Mow the lawn and trim hedges.
Sweep walkways and porches.
Add a fresh doormat or potted plant by the front door.
Even the most stunning interior won’t get noticed if the exterior looks neglected.
Case Study: From Dull to Desirable
A Houston homeowner was struggling to get traction on their listing—until they brought in a local real estate photographer in Houston TX from Pro Photo Listings. After implementing professional staging advice and using their expert photography services, the newly staged and photographed listing saw a 60% increase in online views and received three offers within the first week. Sometimes, it’s not about changing the home—it’s about changing how it's presented.
Final Thoughts
Effective staging is the unsung hero of high-performing real estate listings. By clearing clutter, optimizing lighting, and styling with intention, you create images that stand out in a competitive market.
And when you’re ready to take your listing to the next level, partnering with a skilled professional—like the team at Pro Photo Listings—can make all the difference.
Want your listings to capture attention and generate more buyer interest? Start with smart staging—and trust the lens of a pro to bring it to life. Contact us today.