
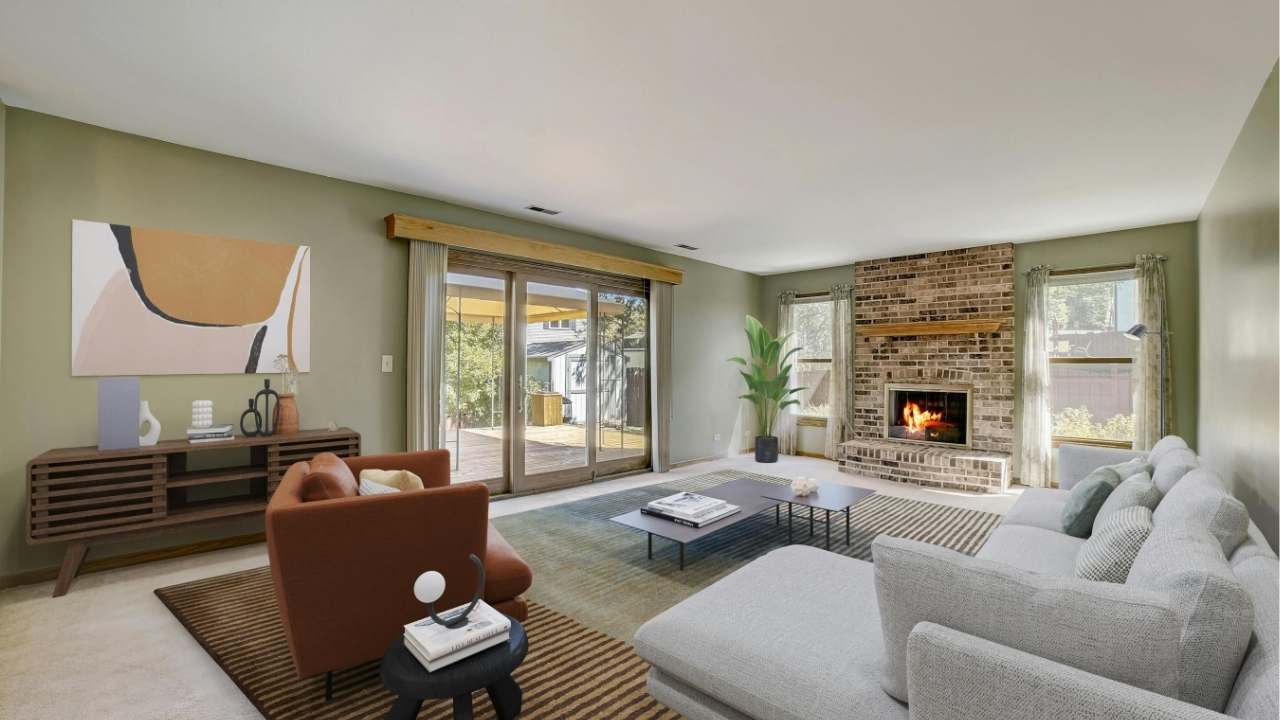
Living Room Photography Tips That Instantly Improve Listings
A living room can make or break a buyer’s first impression. It is often the room where people imagine relaxing, hosting friends, watching movies, or spending quiet evenings with family. If the photos feel warm, bright, and balanced, the whole listing feels more inviting.
In this guide, you’ll learn practical ways to prepare, style, and photograph a living room so it looks better online and attracts more serious buyers.
Start With a Clean, Open Space
Before taking photos, remove anything that distracts from the room itself. Buyers should notice the space, layout, windows, flooring, and natural flow, not piles of magazines, pet toys, cords, or personal items.
A clean living room does not have to feel empty. It should feel intentional. Keep a few pieces that add warmth, such as a throw blanket, a simple coffee table book, or neutral pillows. If you are working with a Houston real estate photographer, ask what should stay and what should go before the shoot begins.
Here are a few quick prep steps:
Hide remote controls, tissue boxes, and charging cables
Remove family photos and highly personal decor
Fluff couch cushions and straighten pillows
Clear coffee tables and side tables
Vacuum rugs and sweep visible flooring
The goal is not perfection. The goal is clarity. Buyers should be able to understand the room in seconds.
Use Light to Make the Room Feel Larger
Lighting is one of the biggest factors in living room photography. A dark room can look smaller, older, and less appealing than it really is. A bright room feels cleaner and more spacious.
Open curtains and blinds to let in natural light. Turn on lamps only if they add warmth without creating odd color tones. If the room has mixed lighting, such as daylight from windows and yellow bulbs from lamps, photos may look uneven. That is where professional editing can help.
Natural light usually works best during the day when sunlight is soft and even. Harsh sunlight can create strong shadows, while cloudy days often produce smooth, balanced light. For many listings, professional photography services in Houston TX can help determine the best time to shoot based on window direction and room layout.
Good lighting also helps show important details, including flooring texture, wall color, trim, built-ins, and fireplace features.
Choose the Right Angles
The best living room photos help buyers understand the space. That means your angles should show layout, depth, and connection to nearby rooms.
Avoid shooting too close to furniture. Step back when possible and photograph from corners to capture more of the room. Keep the camera level so walls and door frames look straight. Tilted lines can make a photo feel amateur, even when the room itself looks great.
A strong living room photo often includes:
The main seating area
A window or natural light source
A fireplace, built-in shelf, or focal point
A clear path into the next room
Enough floor space to show scale
Do not overdo wide-angle shots. A wide lens can make a room look larger, but if it stretches furniture or bends walls, buyers may feel misled when they tour the home.
Style the Room Without Overcrowding It
Great interior photography depends on balance. The room should feel lived-in enough to be welcoming, but not so decorated that it feels busy.
Use simple styling choices that work well on camera. Neutral colors, clean surfaces, and balanced furniture placement usually photograph better than heavy patterns or crowded arrangements. If the couch is pushed too far against one wall, consider moving it slightly to create breathing room. If a chair blocks a window or walkway, remove it for the shoot.
Plants can add life, but too many can clutter the frame. Artwork can help, but loud pieces may pull attention away from the space. The safest approach is to keep decor simple, fresh, and easy to understand.
Short Case Study: Small Changes, Better Photos
A homeowner preparing to list a three-bedroom house had a living room that felt dark and cramped in early phone photos. Before the professional shoot, the agent removed two extra chairs, opened the curtains, replaced dark pillows with lighter ones, and cleared the coffee table. The photographer then shot from the far corner at mid-height, keeping the fireplace and window in frame. The final image made the room look brighter, cleaner, and easier to navigate. Buyers who saw the listing online commented that the home felt “move-in ready,” even though no major updates had been made.
Final Thoughts
Living room photos should make buyers pause, click, and want to see more. Clean the room, use natural light, choose honest angles, and keep styling simple. These small steps can make a listing feel more polished without expensive renovations.
For stronger listing photos that help your home stand out online, contact us today to schedule professional real estate photography.