
How to Use Natural Light to Capture Warm Outdoor Photos
Step outside just before sunset and you’ll see it, the world turns soft, golden, and almost cinematic. Colors glow. Shadows stretch. Even an ordinary backyard feels like a magazine spread. Natural light, when used right, can turn simple outdoor shots into warm, inviting images that feel alive.
In this guide, you’ll learn how to find the best light, position your subject, control shadows, and use simple techniques to create that cozy glow every time you shoot outdoors.
1. Shoot During Golden Hour (And Know Why It Works)
If you want warmth, timing is everything.
Golden hour happens shortly after sunrise and just before sunset. The sun sits low on the horizon, producing soft, diffused light with a natural golden tint. This light wraps around subjects instead of hitting them harshly from above.
Why it works:
The color temperature is warmer.
Shadows are longer and softer.
Highlights are less blown out.
Skin tones look natural and flattering.
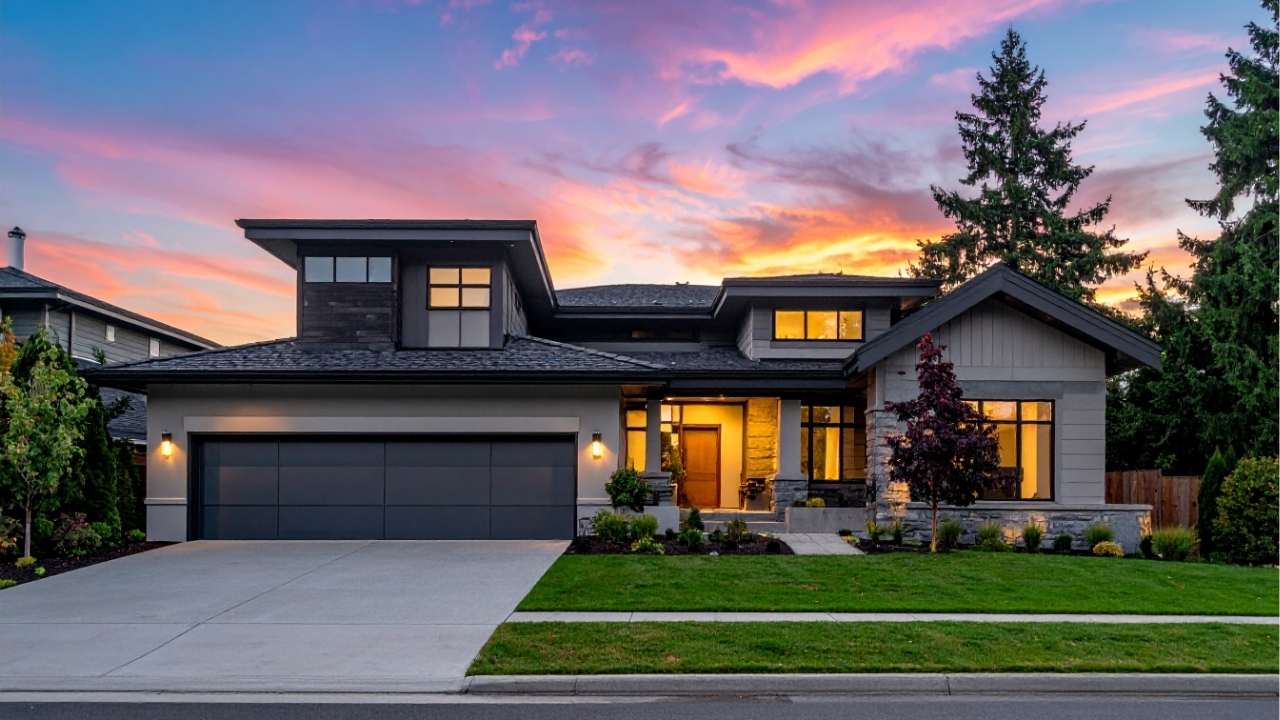
For outdoor property listings, this timing can make a dramatic difference. A seasoned Houston real estate photographer understands that homes photographed at golden hour feel more welcoming and emotionally appealing.
Avoid midday when the sun is overhead. That’s when you get harsh shadows under eyes, bright hotspots, and flat backgrounds. If you must shoot mid-afternoon, look for shaded areas or use structures to block direct light.
2. Position the Light Behind or Beside Your Subject
Most beginners stand with the sun at their back. That’s safe, but not always the most beautiful.
Instead, try backlighting or side lighting.
Backlighting (sun behind your subject):
Creates a glowing rim around hair or edges.
Produces a dreamy, cinematic feel.
Enhances warmth and softness.
Side lighting:
Adds depth and dimension.
Brings out textures in walls, plants, and architectural features.
Creates gentle contrast without looking harsh.
This technique works especially well in residential real estate photography when highlighting patios, porches, or landscaped yards. Side light brings out texture in brick, wood, and greenery in a way flat front lighting never can.
If the image feels too bright, adjust your exposure slightly down to preserve highlights and maintain that warm glow.
3. Use Reflective Surfaces to Boost Warmth
Natural light doesn’t have to come directly from the sun. It also bounces.
Look around. Concrete, light-colored walls, sand, even white fences reflect light. These surfaces can act like natural reflectors, filling in shadows and adding subtle warmth.
You can also bring a simple reflector:
Gold reflectors enhance warmth.
White reflectors create clean fill light.
Even a light-colored shirt can bounce light in a pinch.
When offering photography services, professionals often rely on these simple tricks rather than complex lighting setups. The goal isn’t to overpower natural light, it’s to shape it.
Small adjustments can dramatically soften shadows and keep the image feeling natural instead of staged.
4. Watch the Background and Color Temperature
Warm photos aren’t just about sunlight, they’re about color balance.
Pay attention to:
Green grass reflecting onto faces.
Blue sky casting cool tones.
Mixed lighting near buildings.
Set your white balance slightly warmer if needed, but don’t overdo it. The image should feel inviting, not orange.
In outdoor home shoots, a Houston real estate photographer often balances warmth carefully so brick homes glow without looking artificially tinted. Subtlety is what separates professional work from over-edited images.
Also, keep backgrounds uncluttered. Warm light looks best when it highlights clean lines, textures, and open space.
Case Study: A Backyard Listing Transformation
A local property owner struggled to attract buyers despite a beautifully landscaped backyard. The original photos were taken at noon under bright overhead light. The yard looked flat and harsh.
The photographer rescheduled the shoot for 6:30 p.m. The sun was low, casting a warm glow across the lawn. Side lighting emphasized the stone patio texture. Backlighting added a soft halo to nearby trees. A simple reflector brightened the shaded seating area.
The result? The home listing received more online engagement within the first week than it had in the previous month. The only real change was timing and light direction.
Final Thoughts
Natural light is free, and when used correctly, it’s powerful. Shoot during golden hour, position light intentionally, use reflections wisely, and keep your color balance natural. These small adjustments create warmth that feels effortless.
Next time you step outside with your camera, don’t just look at your subject, study the light first and let it lead the shot.