5 Simple Tweaks That Make Living Rooms Look Bigger in Photos
Ever scroll through home listings and wonder why some living rooms look airy and spacious while others feel cramped—even when they’re the same size? The truth is, small adjustments can completely transform how a space appears on camera. And if you’re working with real estate photography Houston homeowners trust, these details matter even more.
In this guide, you’ll learn five practical tweaks you can make before your next shoot. They’re fast, easy, and proven to help your photos feel more open.
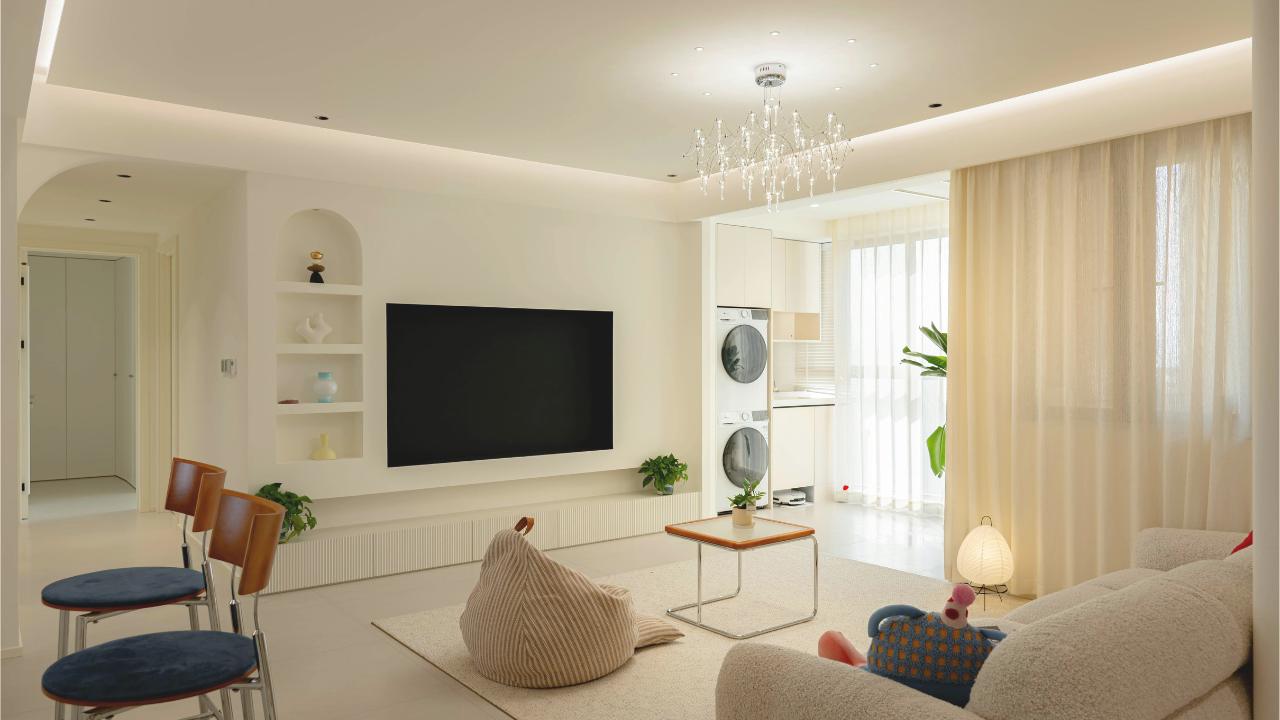
1. Declutter More Than You Think You Need To
Clutter shrinks a room instantly in photos. Even everyday items—mail, remotes, chargers, dog toys—add visual noise. The rule of thumb: remove 30% more than you normally would.
Focus on:
End tables
Coffee tables
Mantels
Console tops
A clean, minimal layout gives the camera room to breathe and makes the space look wider. Pros like Pro Photo Listings often begin every session with a quick declutter sweep because it works that well.
2. Pull Furniture Away From the Walls
It seems backward, but pushing your sofa against the wall actually makes the room feel smaller. A few inches of breathing room adds depth and helps the camera read the space more naturally.
Try these quick adjustments:
Angle accent chairs slightly toward the center.
Float the coffee table instead of anchoring it to a corner.
Keep walkways open and symmetrical.
That tiny shift creates separation between objects, which instantly widens the scene.
3. Use Light Colors and Reflective Surfaces
Light is your best friend when you want a small living room to photograph bigger. Soft neutrals bounce natural light around the room, while glossy or reflective details add visual dimension.
You don’t have to redecorate. Options include:
Swapping dark throw pillows for light ones
Using a neutral blanket over a bold sofa
Replacing heavy curtains with sheer panels
Adding metallic decor accents
If you’re working with professionals who specialize in photography services, they may enhance lighting during editing—but giving them a bright base to start with makes a dramatic difference.
4. Choose the Right Camera Angles
Eye-level shots don’t always flatter small rooms. A slightly elevated angle, combined with shooting from a far corner, expands the perceived footprint.
Here’s what usually works best:
Shoot from the room’s widest angle
Include at least two walls for depth
Keep vertical lines straight to avoid distortion
When these angles are paired with a tidy, well-lit room, even tight spaces look polished and spacious.
5. Let Natural Light Take Over the Room
Artificial lighting can make colors blow out or cast shadows that shrink the room. Natural daylight creates the most realistic and flattering effect.
Before taking photos:
Open all blinds and curtains
Turn off overhead lights
Use lamps only if the room feels unbalanced
Shoot during late morning or early afternoon
This soft, even lighting spreads across the space and gives your camera a wider dynamic range to work with.
Mini Case Study: A Tight Living Room Transformed
A recent homeowner preparing her property for sale had a living room barely 10 feet wide. After a quick assessment, the photographer had her remove two bulky chairs, pull the sofa forward three inches, replace a dark rug with a lighter one, and open the blinds. The final photos looked dramatically larger—so much so that visitors at the open house commented on the “surprisingly spacious” living room. She credited these small adjustments for helping her home go under contract in just five days.
A well-prepared living room doesn’t just look bigger—it attracts more clicks, more interest, and more serious buyers. If you want listing photos that elevate your home’s appeal, get in touch with experts who know how to make every square foot shine.